we have used wire as a similation and clothe as a simulation
today i treied to use wire and cloth together as a simulation
a cloth hang to a wire so cloth simulate accoding to wire motion.
so create a wire first put two pinpoints to ancher it.
created a grid and this time use each achor pot as an individual point to ancher it.
Using the goal target node in SOP we ancher to the parent wire.
as the wire moves the anchered cloth also move together..
Friday, October 29, 2010
Thursday, October 28, 2010
Day 30:Creating a wire grass and fur SOP
Today I stared a new topics on using wire tool in Houdini!,
this is a very good tool able to do some realtime simulations.
to do this in newtork vie wi created a line and a grid then use copy soft tool to combine these two nodes
then select the line and convert to wire object. then add some forces like wind and drag to simulate the wires. change the garvity force to positive so the line able to stand
Last part of the exercise is to add the "Fur" SOP connect to the wire object.
so we we took one part he geometry took form grid and object took from DOp network so when connected it shows the greass with density.
it was a very good realastic animation using wire and fur SOP.
Wednesday, October 27, 2010
Day 29: Creating a cloth simulation.
Cloth simulation is very different in Houdininthan any other 3D simulation software.
you have to create a simple gird and assign it as a cloth properties.
then take and object for example a table on which the cloth going to fall down.
so put the object below it.
adjust the density of the cloth and adjust the tringular division of the cloth to make the animation smoother.
cloth also help to to check the collision geometry with the other static object.
Tuesday, October 26, 2010
Day 28: Using sprite in particle animation.
This exercise we learn how to simulate particles then use the sprite.
used a grid to generate particles.. the added forces like wind and simulat eparticles such way their lefespan is less. also animate as at start they are smaller in size and grow bigger later on.
this particles was replaced by spirte, sprite has it's own properties such as we able to project image on it use ramp and alpha...
also we able to animate sprite in differnt directions...
Monday, October 25, 2010
Day 27: Particle effects 2- creating a pinwheel
Today I stared on creating a simple pin heel and animate it with particles.
I stated with a circle and convert it to polygone so I able to get some vertex poits at the corner of the polygone.
this poits i use as a emitter for the particles. i used emit from source tab to animate the particles. In the source node, I changed emission type to point random. Then I created an animation to rotate the wheel for 360 on z axis.
I add colors to particles and add collision to the ground plane.

when render the scene view we able to see the particles emitting from the wheel.
I stated with a circle and convert it to polygone so I able to get some vertex poits at the corner of the polygone.
this poits i use as a emitter for the particles. i used emit from source tab to animate the particles. In the source node, I changed emission type to point random. Then I created an animation to rotate the wheel for 360 on z axis.
I add colors to particles and add collision to the ground plane.

Friday, October 22, 2010
Day 26: particle effects 1
Today I started working on particle effect tutorial.
Particles able to generate from point, edge surface etc. so I tried to get an sphere and generate particles form point and face the normales.
By using various properties of the curve line wa able to enerate and animate particles from the curve. This particles has quantity and lifespan to be around.
it also ahs some colliding properties with the static objects.
Thursday, October 21, 2010
Day 25: creating ripples from rain drop
Today I was about to complete the Volume fluid tutorial
Last part was on creating a ripple from stumlating a raindrop.
So created a grid object and use a popnet to to create apoints from the grid, use suface random properties of the popnet to generate random number of points from the surface.
to fall the points to the ground use the gravity force. to convert particles to look like rain drom use copy SOP to merge the popnet and metaballs.
at the end use "bulge" node to create a dip in the grid as metaballs touches the grid.
then create a DOP network where add "ripple object" and "ripple solver" to create effects.
The inst is taken from grid and the geometry taken from " objects.
Thsi was a good exercise of procedural modelling.
Wednesday, October 20, 2010
Day 24: Volume fluides - Burn from object
This exercise is also related to "Volume fluid"
To create fire from the object we use a grid or any geometry.
then select the grid and then select "burn from object" tab. press enter.
It creates a flame front container and smoke container.
Now we can use "paint fuel" tab to paint on the object to assign the areas we are not interest to have fire.
we also add "paint temperature" tab to adjust the temperate of the object. Fuel is more impotent as with out fuel there is no fire.
Tuesday, October 19, 2010
Day 23: Volume fluides - Smoke from object
Today I deside to work on volume fluides.. which consist of "Smoke" and "fire",
For smoke there was an exercise on how to create a smoke from a chimney.
so I had created a tube object and later add a smoke container.. arrange the proper size and placement of the container. then ise smoke form object tab to assign the chimney to container..
Now it's time to do some modification to smoke. To change the direction of the smoke we add "wind force"
to looke smoke more naturel adjust verlocity and terbulance of the smoke.

This is a good exercise to understand the posibilities of Volume fluid "Smoke".
Monday, October 18, 2010
Day 22: Mixing the Two liquids
I continue with the digital tutors tutorial I complied on last wed Day 19 talking about the flow of the water in to glass.
Today's tutorial about how to create two liquid flows in to the glass
I had open the earlier tutorial. with the single flow. Sleelct the particle emitter node and duplicate it in the "auto dop network"
 In the scene view change the direction of the emitter opposite and place little cross to cace the emitter each other so we able to create diagonal fluid flow.
lastly create diffuse the two fluids by assign color nodes and using "Gas solver" node in the "merge2" node.
This exercise split it in to have final touches due to rendering the fluid smoothly.
Today's tutorial about how to create two liquid flows in to the glass
I had open the earlier tutorial. with the single flow. Sleelct the particle emitter node and duplicate it in the "auto dop network"

lastly create diffuse the two fluids by assign color nodes and using "Gas solver" node in the "merge2" node.
This exercise split it in to have final touches due to rendering the fluid smoothly.
Friday, October 15, 2010
Day 21: Houdini 11 for Trainers Day2
Today some students from universities did not came fro the session as they unable to cope with yesterday's lesson. Session is for trainers so "Debra" and "Lesely" told you need to have basic understanding of Houdini work flow else. difficult to cope.
5. Morning session conducted by "Leselly" he covered Particle FX with POPs(Particle operators) Exploring houdini concepts such as instancing geometry in to particles.
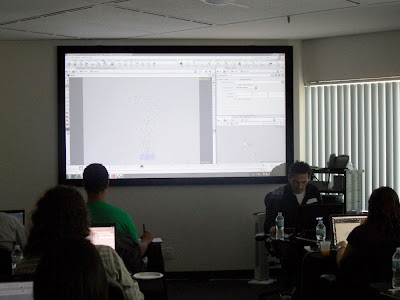
6. After tea break covered topics like rendering the particles FX in scene. and getting acquainted with DOPs (Dynamic Operators)
After the lunch "Jenny" from SideFX Toronto office informed people about the instance programme . "Debra" covered topics on
7. Exploring the various forces in DOPs and how their work flow. using the DOPS in the scene and breaking it up.

8. After the ea break was an Q & A session followed by discussion on Houdini in Academic Community : Learning and teaching Houdini in Toronto.

5. Morning session conducted by "Leselly" he covered Particle FX with POPs(Particle operators) Exploring houdini concepts such as instancing geometry in to particles.

6. After tea break covered topics like rendering the particles FX in scene. and getting acquainted with DOPs (Dynamic Operators)

After the lunch "Jenny" from SideFX Toronto office informed people about the instance programme . "Debra" covered topics on
7. Exploring the various forces in DOPs and how their work flow. using the DOPS in the scene and breaking it up.

8. After the ea break was an Q & A session followed by discussion on Houdini in Academic Community : Learning and teaching Houdini in Toronto.

From left (Me), Damian, Lana, Lazley (LA office) , Debra (LA office) and Alisha (LA office)
Thursday, October 14, 2010
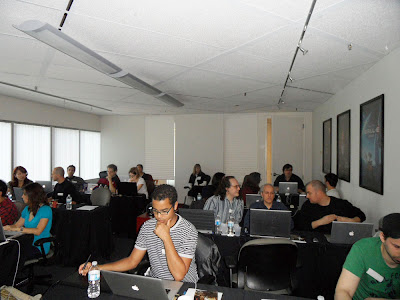
Day 20: Houdini 11 for Trainers Day1
Sidefx LA has conducted a two days training session for trainers of Toronto. Around 20+ people from different schools had attended the session, some of them are freelancers, student from universities and professionals form companies.

Morning session conducted by "Debra" she covered the topics
1.An introduction to sidefx software, understanding Houdini work flow, creating scene, adding camera and digital assent creation

2. After the tea break she covered topics on exploring Houdini concepts such as copy stamping, instance rendering and lighting the scene.
Afternoon session was conducted by "Lessly", he covered the topics
3. Modeling objects using SOPs (Surface Operator), Shader operators, material pallet and mantra surface node.

4. After the tea break he covered ROPs (render operators), creating basic particle animation- particle source, Emission types, particle attributes.

Session end by presentation by Rob about Houdini academic community and examples of the student works.
Wednesday, October 13, 2010
Day 19: Creating a fluid flow in the glass
Today was a rainy morning...while on the way to office the rain started.. so quickly buy a coffee from Starbucks and went to office.
I started working on the Digital Tutors "Constant fluid flow tutorial", This tutorial start with a glass. so I used a geometry node to create a curve surface and followed by "revolve" node to make it a glass model.
I went to scenelevel then from Volume Fx shelf added a emitter from source tab twice.
This created a source of the emitter in the scene window.
I had adjusted the alignment of the source such way it will fall in the cup. I rewind and play the scene.
in the AutoDOPNetwork, finally I add file and save it to the local hard drive so I able to rewind and play the simulation real time.
I also animate the emitter source in the birth tab of emitter at frame 60 so the emitter stops after frame 30.
This was a good learning experience. as i realize some time the simulation once it saves in the disk it does not update real time.. need to render it again.
Tuesday, October 12, 2010
Day 18: Fluid Force-Object Feedback
Today the temparature hit 8C very cold outside...
I was about to complete the last part of the fluid tutorial. "Fluid Force-Object Feedback"
In this tutorial we had add a static object and used a fluid force to stimulate the object to feedback (move it)
 We had used the same structure from the previous tutorial and made some changes by adding a rigid body object (Utah Teapot). It followed by rbdsolver and fluidforce. we also add new nodes like "Pump", "Rbdsolver", "merge" and "ground plane". and connect nodes as shown in fig. below.
In last part of the tutorial, we change Density properties of "RBD object" to reduce mass and "scale force vector" reduce it to minimum.. rewind and play the simulation.
I was about to complete the last part of the fluid tutorial. "Fluid Force-Object Feedback"
In this tutorial we had add a static object and used a fluid force to stimulate the object to feedback (move it)

In last part of the tutorial, we change Density properties of "RBD object" to reduce mass and "scale force vector" reduce it to minimum.. rewind and play the simulation.
Friday, October 8, 2010
Day 17: Creating a constant fluid flow
Today was a long weekend moring, every body was exited for a long weekend (Thanks giving holiday on Monday!)
You have seen how to create a fluid object by using "RBD object and AutoDopNetwork" in my earlier blog... Today, I started working on the fluid tutorial to create a constant fluid flow.
We need to have a "static object" as a source of Fluid from which the fluid is going to Flow and a fluid container in which fluid will be flowing. After creating the alignment between these two objects we need to add some notes in the "Dynamics network".

Static object node need to link to the "box1" geometry out. we need to add a merge node which link static object and fluid object. make sure the relationship will be "Source relationship". the out of "merge1" node connect it to input of "fluidsolver1" node. under the source change velocity type to "point velocity". So that it take the velocity of point node from the geometry node of static object.
lastly, it followed by the gravity node. so "click on" the display of gravity node to see the final effect of the flow.
 Today was the last day for two toronto interns Damian (from Mexico" and James (from UK), Most of the sidefx people go to "Moose" a streetside pub for a fareware lunch. They had shared thier own personal experience after that...
You have seen how to create a fluid object by using "RBD object and AutoDopNetwork" in my earlier blog... Today, I started working on the fluid tutorial to create a constant fluid flow.
We need to have a "static object" as a source of Fluid from which the fluid is going to Flow and a fluid container in which fluid will be flowing. After creating the alignment between these two objects we need to add some notes in the "Dynamics network".

lastly, it followed by the gravity node. so "click on" the display of gravity node to see the final effect of the flow.

Thursday, October 7, 2010
Day16: INCEPTION - Architecture of Dreams
Today was a sunny day!... Sunny Morning.
Today Sidefx team went for a "Sharing session by VFX Supervisor Paul Franklin and Rob Hodgson on set VFX Supervisor."
 Double Negative created all of the visual effects for ‘Inception’, roughly 500 shots in the final film. According to VFX Supervisor Paul Franklin, nearly all of them required tight collaboration between the special effects and visual effects teams.

The whole sharing session was very informative and educative. Mr. Paul delived a lot information about his planning of the scene in the movie then about the co-ordination with the other people in the team. He emphasise the sucess of the process is mainly depend on how you plan the scene and communicate with diffeent people in the differne knowledge level to get your job done.


The show was conducted by "Computer animation studios of Ontario" and sponcered by HP and Intel. People from computer graphic and animation industry from toronto region attended the event.
From sidefx toronto office almost all the people attended this event.

Pls. find more information from "digital media world" from the link below
http://www.digitalmedia-world.com/index.php?option=com_content&view=article&id=2616:inception-architecture-of-dreams&catid=76:feature-articles-from-digital-media-world-magazine&Itemid=96
From the "CG Society"
http://features.cgsociety.org/story_custom.php?story_id=5907
Today Sidefx team went for a "Sharing session by VFX Supervisor Paul Franklin and Rob Hodgson on set VFX Supervisor."


The whole sharing session was very informative and educative. Mr. Paul delived a lot information about his planning of the scene in the movie then about the co-ordination with the other people in the team. He emphasise the sucess of the process is mainly depend on how you plan the scene and communicate with diffeent people in the differne knowledge level to get your job done.


The show was conducted by "Computer animation studios of Ontario" and sponcered by HP and Intel. People from computer graphic and animation industry from toronto region attended the event.
From sidefx toronto office almost all the people attended this event.

Pls. find more information from "digital media world" from the link below
http://www.digitalmedia-world.com/index.php?option=com_content&view=article&id=2616:inception-architecture-of-dreams&catid=76:feature-articles-from-digital-media-world-magazine&Itemid=96
From the "CG Society"
http://features.cgsociety.org/story_custom.php?story_id=5907
Wednesday, October 6, 2010
Day 15: Creating a river flow with terrain.
Today was a bit better day... as no rain and temp was arounf 11 C..
Moring, I continue witht the tutorial on creating the river flow with terrain object..

I created a terrain from the grid object, use "sculpt" node to pull the points up and down.
later created a sphere as a source to create fluid emitter and place the sphere above the terrain.

I use "DOP" network to merge the tow objects.then add fluid object and fluid solver with gravity.
merge all the nodes..rewind and play the animation..
It was a good learning experience as i try out different node combination of creating the same effects.
Tuesday, October 5, 2010
Day 14: Creating Fluid effects.
Today was a gray day.. raining the whole day and temp was around 10C
Morning I started with the "Houdini Fluid effects for TDS" tutorial from CMIVFX.
This tutorial is intensive on how to create a simple fluid effects from a object.
Tutorial shows how to create a fluid object and later convert the object using "Fluid solver to volumes"
This volume is used by DOP network and gravity nodes to animate.
I learned some new techniques like how to use static object and link it to this animation so we able to get a constant flow of fluid..
.
Monday, October 4, 2010
Day13: Rendering using material and shading network.
Today the temparature drop below 10C.. weather was bit chill...
Morning I started working on the last part Material and shading network.
I used Material tab to create and surfaces using Houdini's "mantra surface" also created a material "clay"
Change the color and applied material and surface to the objects.
Afternoon add 2 spotlights and adjust the lighthing accoring to Two points lights in the scene.
I manipulate the angels of the scene.
Lastly I created the mantra node, to render the scene..using Mplay imge viewer.
 Evening I feedback to Rob, He commented he need to try out another way to this tutorial as the command the "CREATIONTIME" is not working as it suppose to be..
Morning I started working on the last part Material and shading network.
I used Material tab to create and surfaces using Houdini's "mantra surface" also created a material "clay"
Change the color and applied material and surface to the objects.
Afternoon add 2 spotlights and adjust the lighthing accoring to Two points lights in the scene.
I manipulate the angels of the scene.
Lastly I created the mantra node, to render the scene..using Mplay imge viewer.

Friday, October 1, 2010
Day12: Working with RBD objects of the Pillar, Use of DOP network
Morning I continue with the previous day tutorial, Today I continue the tutorial "smash the column with dynamics"
This tutorial explain what is Dynamic Network, Render the shot, render the flipbook.
In Houdini "AutoDOPNetwork" is beatuiful part, it's a dynamic network get build. This is where objects, forces and constrains are setup and network defines how they interact.
When create a flipbook or rendereran image or an image sequence, Houdini use it's image viewver called MPlay. Thos viewer let you view different channels, compare shots and tinker with brightness and contrast as you playback your sequence.
The viewer also incorporate sound and open and save images out in different image formats such as OpenEXR, TIFF,JPG or quicktime.
Untill evening, I completed all the above process. Tha last part of the process was to add material, light's and camera. I will continue it on Monday.
Subscribe to:
Posts (Atom)